In this article we will talk about methods of positioning items in an order in imos iXusing existing items in the Article Center or in the 3D ALL Catalogue
Before we begin, you should know that imos uses a function called "SNAP", which is designed to automatically position items against the wall or next to an item that has previously been brought into the scene.
In a room you have already created, you will choose a cabinet from the Article Center / 3D ALL Catalogue and place it against the wall in the location where you want to start creating the design. The cabinet always SNAPs to existing walls and is directed towards the inside of the room, with the red part representing the front.
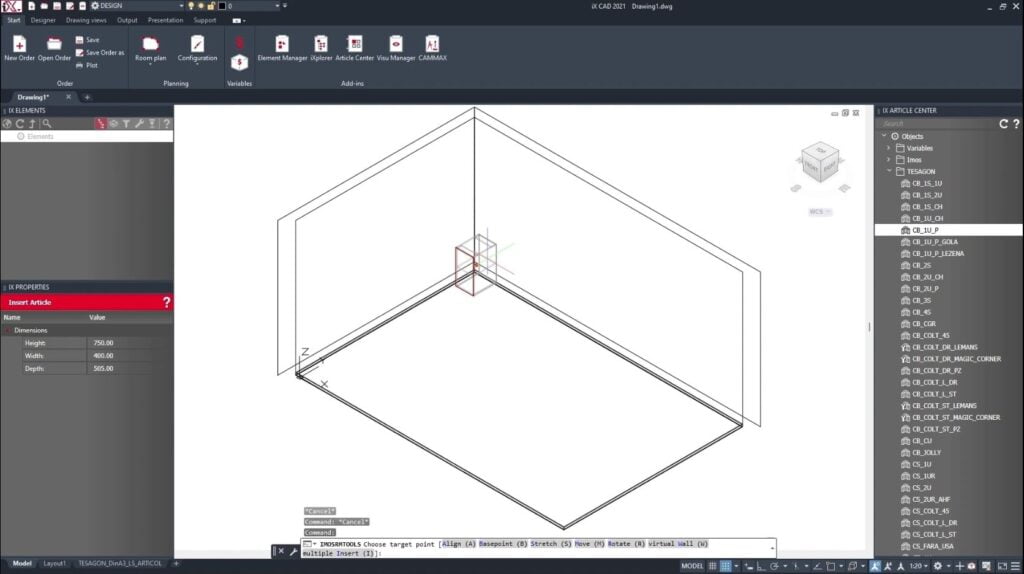
When you insert a new item, you can SNAP it separately to the walls of the room, or SNAP to the existing item.
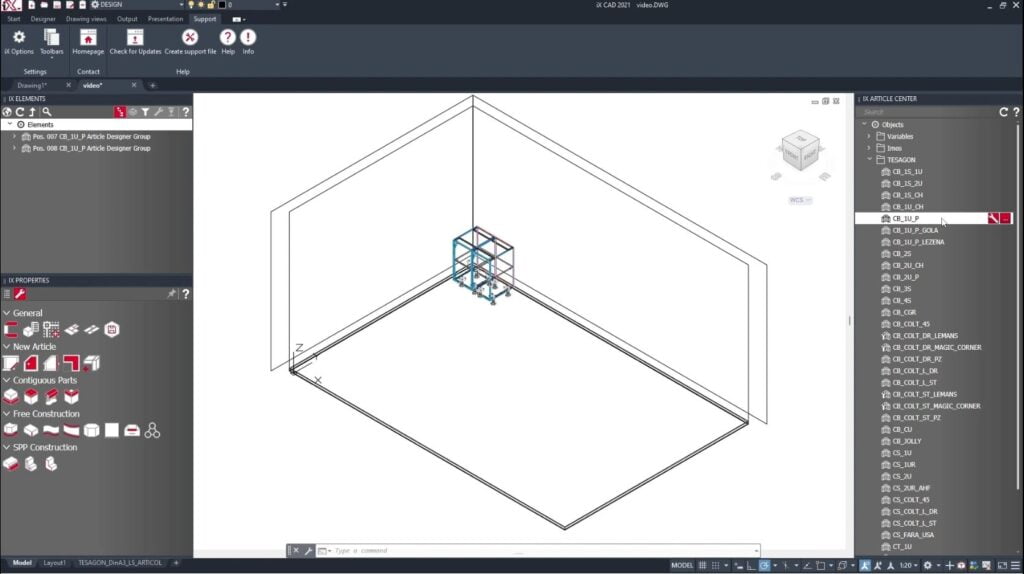
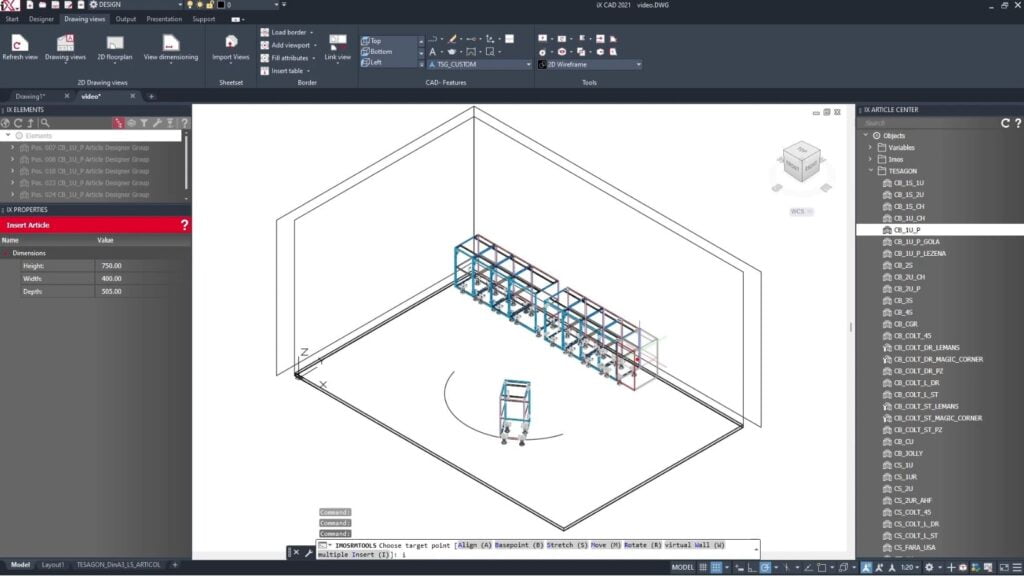
You can bring items into the order as described above, or by using one of the functions in the bottom toolbar of the software, which I will present below.
A function is activated by typing the corresponding blue capital letter.

Align (A)
To activate this function, type A. Items can be aligned in a particular direction, for example with the front to the left or to the right, by indicating the direction with the mouse after activating the function.

Basepoint (B)
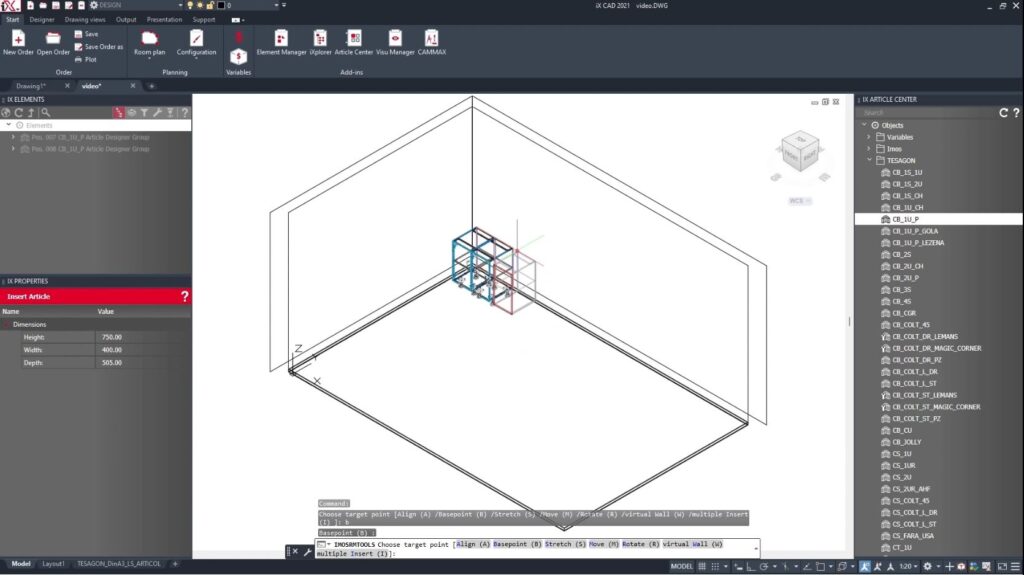
This function allows you to position an item using a selected point. You bring the desired item into the scene, press B, select a point on the item that you want to place in the room and bring the item next to the item you want to attach it to, again selecting a point to SNAP the selected point to from the newly inserted item.
Stretch (S)
The third way to insert an item is through the STRETCH function, by pressing the S key. In this mode you can enlarge or reduce an item before placing it in the scene. Just choose the direction in which you want to modify the article, and change it with the mouse.
In the bottom toolbar you will have two options for modifying the item: OVERALL SIZE, where you can enter the total size of the item, or DIFFERENCE IN SIZE, where you will enter the amount you want to increase or decrease the item. If you want to decrease the item, you will enter a negative value.
To confirm the change, right click and select ENTER.

Move (M)
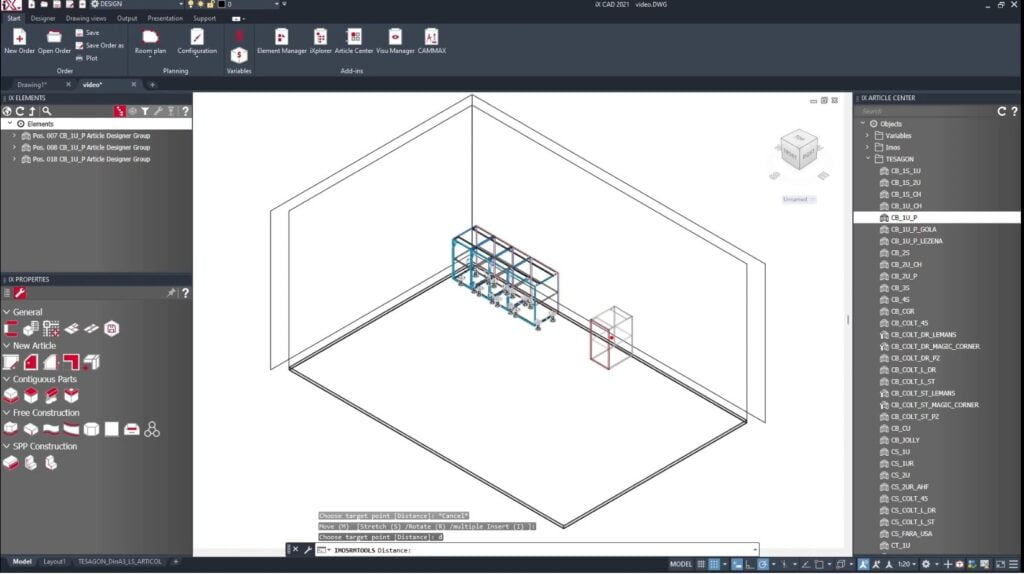
Another way to insert an item into an order is through the MOVE function, by pressing the M key. With this function, the item can be inserted at a certain distance from an existing item.
To do this you bring the item into the order and SNAP it to an existing item. If you want to move it to a certain distance from the item you SNAPped it to, left click, press the M key, and enter the distance you want to move it to. Once you have entered the desired distance in mm, right click and select ENTER to confirm.
This way, the item is moved to the desired distance straight from when you entered it in the order.
Rotate (R)
The fifth way to insert an item is via the ROTATE function, which you access by pressing the R key. With this function, the item can be inserted directly rotated in relation to a reference (e.g. a wall or an existing item).
To do this, you bring the item into the order, SNAP it to an existing item and press R. You choose which point you want to rotate the item to, set how many degrees you want it rotated from the reference point and imos automatically positions it. To confirm, right-click and select ENTER.

Virtual Wall (W)
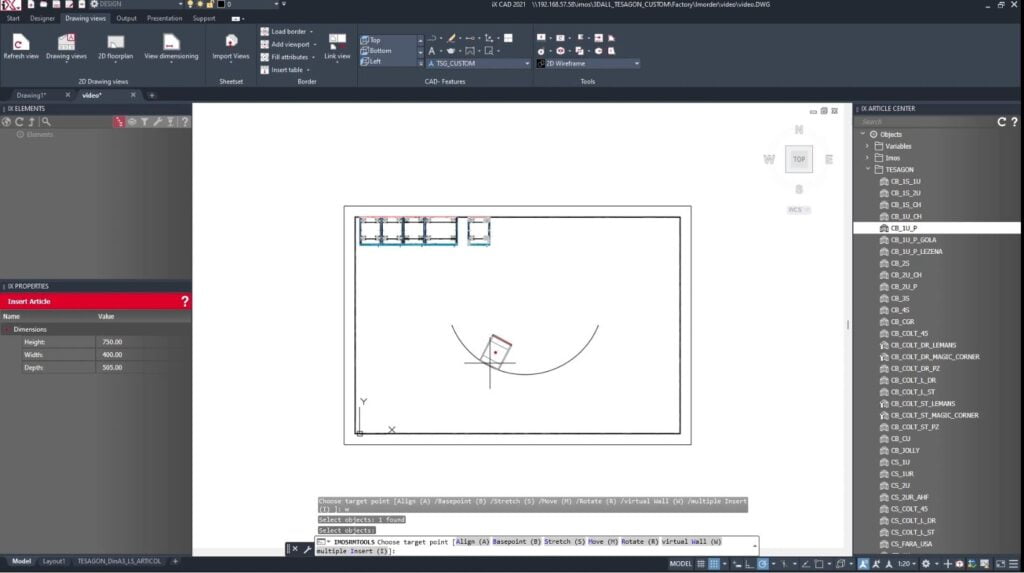
The sixth way to insert an item into an order is through the VIRTUAL WALL function This function allows you to position an item against a virtual wall.
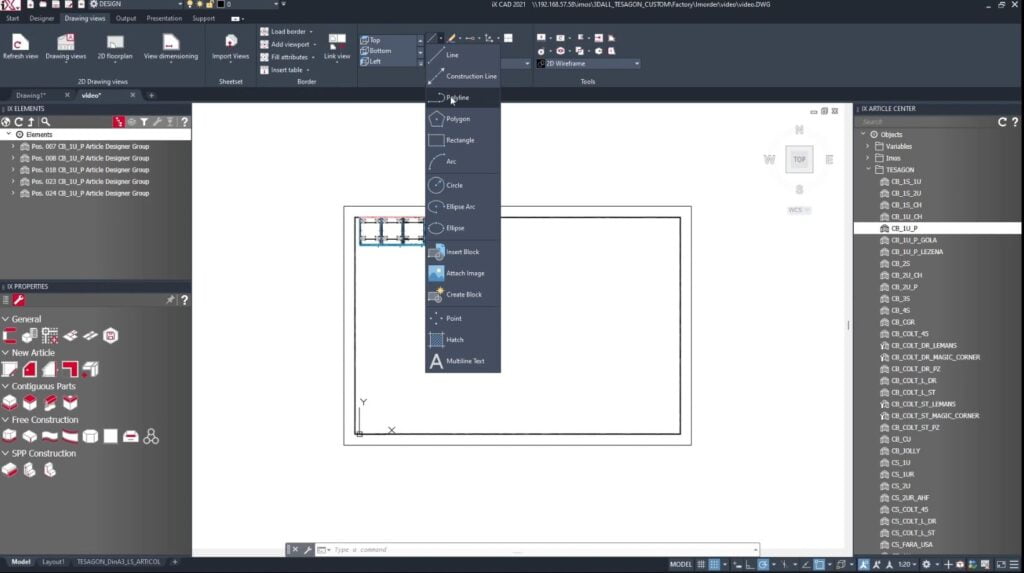
To create a virtual wall follow these steps. In the top view of the camera (TOP), draw a circular arc using the Polyline function in the Drawing Views menu. Drag the polyline and convert it to a circular arc.

Once you have created the virtual wall, bring the item into the order and call the VIRTUAL WALL function by pressing the W key. Select the polyline and SNAP to it. To confirm, right click and ENTER.
Multiple Insert (I)
The seventh way to insert an item into the order is through the MULTIPLE INSERT function, which you call by pressing the I key. With this function, the same item can be inserted more than once. You select the article from the Article Center / 3D ALL catalogue, place it in the scene by SNAPping to an existing reference. To add the article more than once, call up the MULTIPLE INSERT function by pressing the I key. Each time you press the I key, a new item will be placed in the scene. To end the sequence, press right click and ENTER.
All these features and the articles in the 3D ALL catalogue are designed to help you design faster and more efficiently. If you want to learn more about the 3D ALL catalogue, check here.

